Introduction
If you’ve ever had the pleasure of dining at a Japanese restaurant, you might have encountered the delightful dish known as chicken katsu. This crispy, golden-fried chicken cutlet is beloved for its juicy interior and perfectly crunchy exterior, making it a favorite among both kids and adults. But did you know that you can easily recreate this dish at home?
Making chicken katsu at home is not only rewarding but also allows you to control the ingredients, ensuring a fresh and delicious meal every time. Whether you’re new to cooking or a seasoned chef, this guide will walk you through the entire process, from choosing the right chicken to achieving that perfect, restaurant-quality crunch. So, let’s dive in and discover how you can bring the flavors of Japan to your kitchen with this simple yet satisfying dish.
What is Chicken Katsu?
The Origins of Chicken Katsu
Chicken katsu, like many beloved dishes, has a rich history that intertwines with the evolution of Japanese cuisine. The word “katsu” is derived from the English word “cutlet,” and traditionally, katsu refers to breaded and fried meat cutlets. The most famous of these is tonkatsu, which is made with pork.
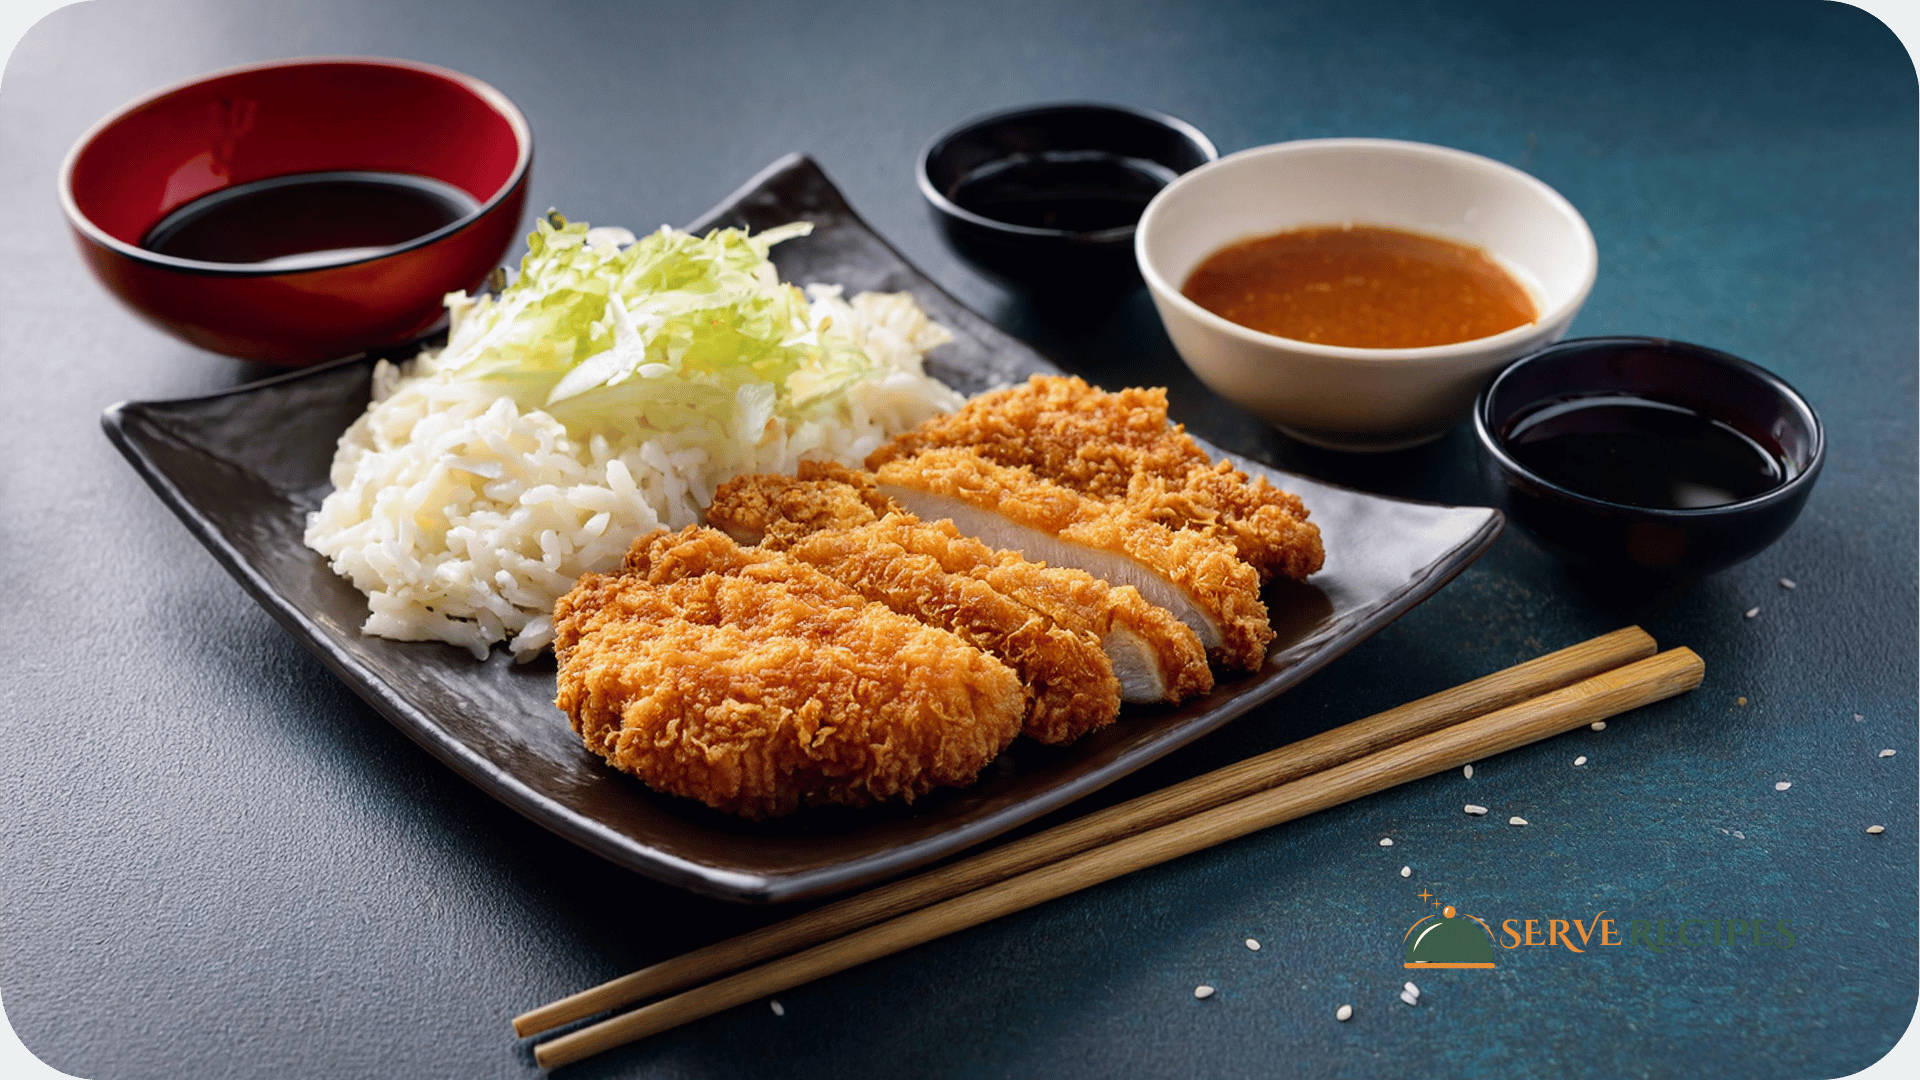
Chicken katsu emerged as a variation of tonkatsu, offering a lighter alternative using chicken breast or thigh instead of pork. The dish became popular in Japan during the early 20th century, influenced by Western cuisine. Over time, chicken katsu has become a staple in Japanese homes and restaurants, often served with rice, shredded cabbage, and a tangy tonkatsu sauce.
Chicken Katsu in Japanese Culture
In Japan, chicken katsu is more than just a meal—it’s a comfort food, often enjoyed in a variety of settings. You’ll find it in bento boxes, served with a side of miso soup, or atop a steaming plate of curry rice. It’s also a popular dish in Japanese family restaurants and fast-food joints, where it’s often served with fries and a salad.
The versatility of chicken katsu has made it a beloved dish beyond Japan’s borders. Whether it’s served in a sandwich (katsu sando), over rice (katsu don), or as part of a meal with a variety of sides, chicken katsu is a dish that brings joy to any table. For a variety of cooking methods, including air-frying, take a look at this Air-Fryer Chicken Katsu Recipe from Serious Eats.
Essential Ingredients for Chicken Katsu
Choosing the Right Chicken
The foundation of any good chicken katsu is, of course, the chicken itself. For the best results, you’ll want to start with fresh, high-quality chicken.
Types of Chicken Cuts to Use
- Chicken Breast: The most common cut for chicken katsu is the chicken breast. It’s lean, and tender, and cooks evenly, making it ideal for achieving that juicy interior. When using chicken breast, you’ll want to butterfly and flatten it to ensure it cooks quickly and evenly.
- Chicken Thighs: For those who prefer a richer flavor and slightly juicier meat, chicken thighs are a great alternative. Thighs have more fat, which can help keep the meat moist during frying. However, they may require a bit more attention during cooking to ensure they are cooked through.
The Importance of Panko Breadcrumbs
One of the key elements that sets chicken katsu apart from other fried chicken dishes is the use of panko breadcrumbs. Panko is a type of Japanese breadcrumb that is coarser and flakier than regular breadcrumbs, resulting in a lighter, airier crust.
What Makes Panko Breadcrumbs Special?
Panko breadcrumbs are made from crustless white bread that is baked and then ground into coarse flakes. Because of their texture, they absorb less oil than traditional breadcrumbs, which means your chicken katsu will be crispy without being overly greasy. This unique quality of panko is what gives chicken katsu its signature crunch.
Where to Find the Best Panko
You can find panko breadcrumbs in most supermarkets, usually in the international food aisle. However, for the best quality, visit an Asian grocery store, where you might find a variety of panko options. Some brands offer seasoned panko, but for a classic chicken katsu, plain panko is preferred, so you can control the flavor with your seasonings.
Additional Ingredients
While the chicken and panko are the stars of the show, a few other ingredients play crucial supporting roles in creating the perfect chicken katsu.
- Seasonings: Simple seasonings like salt and pepper are essential for enhancing the flavor of the chicken. You might also consider adding a pinch of garlic powder or paprika for an extra kick.
- Flour: Before breading, the chicken is first dredged in flour. This step helps the egg wash adhere to the chicken and provides a base layer that will hold the panko in place.
- Eggs: Beaten eggs serve as the binding agent that helps the panko stick to the chicken. Make sure your eggs are well-beaten to create a smooth coating.
- Optional Ingredients: For a twist on the traditional recipe, you can mix sesame seeds into the panko for added flavor and texture, or experiment with spices like cayenne pepper for a bit of heat.
Preparing Your Chicken for Katsu
Butterflying and Flattening the Chicken
To ensure that your chicken cooks evenly and quickly, it’s important to prepare the chicken breasts properly. Butterflying and flattening the chicken also helps achieve the ideal thickness for frying.
Step-by-Step Guide:
- Butterfly the Chicken: Place the chicken breast on a cutting board. Holding your knife parallel to the board, carefully slice the chicken breast in half horizontally, stopping just before you cut all the way through. Open the chicken breast like a book.
- Flatten the Chicken: Cover the butterflied chicken breast with a piece of plastic wrap or parchment paper. Use a meat mallet, rolling pin, or the bottom of a heavy pan to gently pound the chicken to an even thickness, about 1/2 inch thick. This will help the chicken cook evenly and stay tender.
Seasoning the Chicken
Once your chicken is prepped, it’s time to season it. Seasoning the chicken before breading ensures that every bite is flavorful.
Best Practices for Seasoning:
- Salt and Pepper: Season both sides of the chicken breast with salt and pepper. This simple seasoning helps enhance the natural flavors of the chicken.
- Garlic Powder or Paprika: For added depth, sprinkle a little garlic powder or paprika on the chicken. These spices complement the breading and add a subtle warmth to the dish.
Customizing the Flavor:
Feel free to get creative with your seasoning. If you like your chicken with a bit of spice, add some cayenne pepper or chili powder. For a more aromatic flavor, try using herbs like thyme or rosemary. The key is to season generously, as the breading will also absorb some of the seasoning during cooking.
The Breading Process: How to Achieve Perfectly Crispy Chicken Katsu
Setting Up Your Breading Station
Having a well-organized breading station is essential for making chicken katsu. It ensures the process is smooth, efficient, and less messy.
How to Organize:
- Flour: In the first shallow dish, place all-purpose flour. This will be the first step in breading the chicken.
- Egg Wash: In the second dish, beat two large eggs. This will help the panko adhere to the chicken.
- Panko Breadcrumbs: In the third dish, add the panko breadcrumbs. Make sure there’s enough panko to fully coat the chicken pieces.
- Work from Left to Right: Arrange the dishes in a line, with the chicken on the far left, followed by flour, egg wash, and panko, and an empty plate on the far right for the breaded chicken.
The Three-Step Breading Process
Now that your station is set up, it’s time to bread the chicken. The key to perfect chicken katsu lies in this three-step process.
Step 1: Dredging in Flour
Take a piece of chicken and dredge it in the flour, making sure to coat both sides thoroughly. Shake off any excess flour before moving on to the next step.
Step 2: Coating the Beaten Eggs
Next, dip the floured chicken into the egg wash. Let any excess egg drip off, so you don’t end up with too thick of a coating.
Step 3: Pressing into Panko Breadcrumbs
Finally, press the chicken into the panko breadcrumbs, ensuring an even coating. Press down gently to make sure the panko adheres well to the chicken. For an extra crispy katsu, you can double-bread the chicken by repeating the egg wash and panko steps.
Tips for Getting Extra Crispy Chicken Katsu
- Double Breading: If you love an extra-crispy crust, double bread the chicken by repeating the egg and panko steps. This will create a thicker, crunchier coating.
- Keeping Breadcrumbs Light: To keep the panko breadcrumbs light and airy, avoid pressing too hard when coating the chicken. A gentle press is enough to make sure they stick without becoming too dense.
- Chilling the Chicken: After breading, let the chicken rest in the fridge for about 15 minutes. This helps the breading adhere better and prevents it from falling off during frying.
Cooking Chicken Katsu: Frying vs. Baking
Frying Chicken Katsu
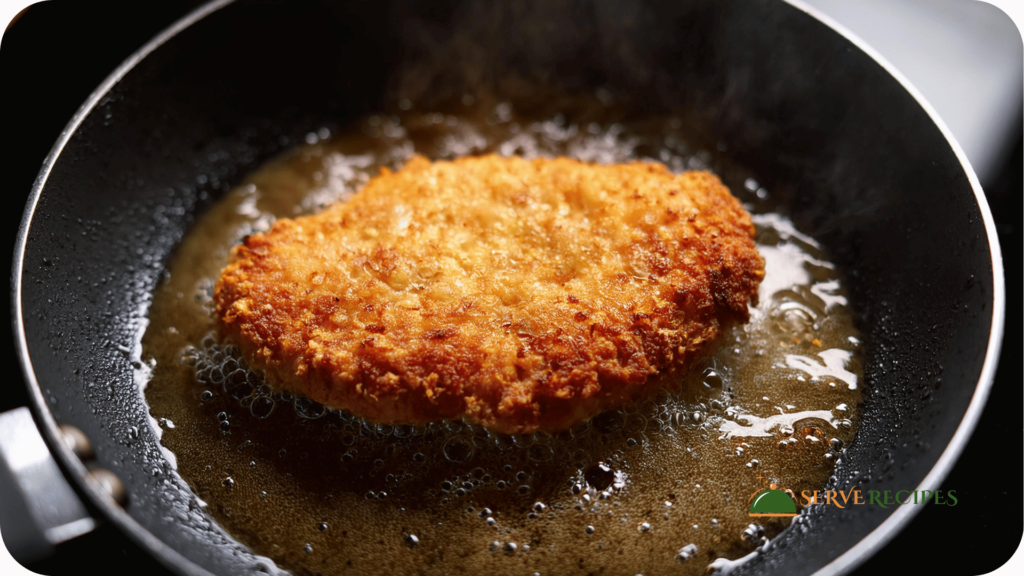
Frying is the traditional method for cooking chicken katsu, resulting in a beautifully golden, crispy crust. Here’s how to do it perfectly:
Best Oils for Frying
When frying chicken katsu, you’ll want to use a neutral oil with a high smoke point, such as vegetable oil, canola oil, or peanut oil. These oils won’t overpower the flavor of the chicken and will ensure an even, crisp fry.
Step-by-Step Guide to Frying Chicken Katsu:
- Heat the Oil: In a large, heavy-bottomed skillet, heat about 1/2 inch of oil over medium heat. The oil should reach around 350°F (175°C) before you start frying. You can test the temperature by dropping a small piece of bread into the oil—if it sizzles and turns golden in about 60 seconds, the oil is ready.
- Fry the Chicken: Carefully place the breaded chicken into the hot oil. Fry for 3–4 minutes on each side, or until the chicken is golden brown and cooked through. Avoid overcrowding the pan, as this can lower the oil temperature and lead to soggy chicken.
- Drain the Chicken: Once cooked, remove the chicken katsu from the oil and place it on a wire rack or a plate lined with paper towels to drain any excess oil.
How to Avoid Common Frying Mistakes
- Oil Temperature: Keep an eye on the oil temperature. If it’s too low, the chicken will absorb too much oil and become greasy. If it’s too high, the breading may burn before the chicken is cooked through.
- Don’t Overcrowd: Fry the chicken in batches if necessary to avoid overcrowding the pan. This ensures even cooking and prevents the chicken from steaming instead of frying.
Baking Chicken Katsu
If you’re looking for a healthier alternative, baking is a great option. While the result won’t be exactly the same as frying, with the right techniques, you can still achieve a crispy, delicious chicken katsu.
How to Bake Chicken Katsu Without Sacrificing Crunch:
- Preheat the Oven: Preheat your oven to 400°F (200°C). Line a baking sheet with parchment paper or foil for easy cleanup.
- Adjust the Breading: To help the chicken crisp up in the oven, you can lightly spray the breaded chicken with cooking spray or drizzle with a little melted butter or oil. This will help the panko turn golden and crispy in the oven.
- Bake the Chicken: Place the breaded chicken on the prepared baking sheet. Bake for 15-20 minutes, flipping halfway through, until the chicken is cooked through and the breading is golden brown.
Tips for Even Baking:
- Use a Wire Rack: For extra crispiness, place the chicken on a wire rack set over the baking sheet. This allows air to circulate the chicken, helping it cook evenly and stay crispy.
- Don’t Overbake: Keep an eye on the chicken as it bakes. Overbaking can dry out the meat and make the breading too hard.
Testing for Doneness
Whether frying or baking, it’s important to ensure that your chicken katsu is cooked through. The internal temperature should reach 165 °F (74 °C).
How to Tell When Your Chicken Katsu is Perfectly Cooked:
- Visual Cues: The chicken should be golden brown on the outside and juicy on the inside. If you cut into the chicken, the juices should run clear, not pink.
- Use a Meat Thermometer: For accuracy, use a meat thermometer to check the internal temperature of the thickest part of the chicken.
Making Tonkatsu Sauce and Other Dips
Classic Tonkatsu Sauce
No chicken katsu is complete without a drizzle of tangy, sweet tonkatsu sauce. This thick, savory sauce perfectly complements the crispy chicken and adds a burst of flavor to every bite.
Ingredients Needed for Traditional Tonkatsu Sauce:
- 1/4 cup ketchup
- 2 tablespoons Worcestershire sauce
- 1 tablespoon soy sauce
- 1 tablespoon sugar
- 1 tablespoon mirin or rice vinegar
- 1 teaspoon Dijon mustard (optional)
Simple Steps to Make the Perfect Dipping Sauce:
- Combine Ingredients: In a small bowl, mix ketchup, Worcestershire sauce, soy sauce, sugar, and mirin (or rice vinegar). If you like a bit of tanginess, add Dijon mustard.
- Whisk Until Smooth: Whisk the ingredients together until the sugar is fully dissolved and the sauce is smooth.
- Adjust to Taste: Taste the sauce and adjust the seasoning if needed. If you prefer it sweeter, add a bit more sugar. For more tang, add extra vinegar or mustard.
- Serve with Chicken Katsu: Drizzle the sauce over your chicken katsu, or serve it on the side for dipping.
Creative Sauces for Chicken Katsu
While classic tonkatsu sauce is always a winner, you can also experiment with other dipping sauces to pair with your chicken katsu. Here are a few ideas:
Spicy Mayo
- Ingredients: Mayonnaise, sriracha, lime juice
- Instructions: Mix mayonnaise with sriracha to taste, and add a squeeze of lime juice for brightness. This sauce adds a creamy, spicy kick to your katsu.
Ginger-Soy Sauce
- Ingredients: Soy sauce, grated ginger, garlic, honey, and sesame oil
- Instructions: Combine soy sauce with grated ginger, minced garlic, honey, and a dash of sesame oil. This light and flavorful sauce is great for dipping or drizzling over rice.
Curry Sauce
- Ingredients: Japanese curry roux, water, soy sauce
- Instructions: Make a simple curry sauce using store-bought Japanese curry roux. Dilute with water and a splash of soy sauce. Serve the katsu over rice and pour the curry sauce on top for a comforting meal.
Storing and Reusing Sauces
If you have leftover tonkatsu sauce or other dips, here’s how to store them for later use:
Best Practices for Storing Homemade Sauces:
- Refrigerate: Store sauces in an airtight container in the refrigerator. They will keep for up to a week.
- Reheat: Reheat sauces gently on the stovetop or in the microwave before serving. If the sauce has thickened too much, you can thin it out with a bit of water or soy sauce.
Tips for Using Leftover Sauce:
- Marinade: Use leftover tonkatsu sauce as a marinade for chicken or pork before grilling or baking.
- Dressing: Thin out the sauce with a bit of oil and vinegar to use as a salad dressing.
Serving Chicken Katsu: Ideas and Accompaniments
Traditional Japanese Serving Style
Chicken katsu is often served as part of a larger meal, with simple yet flavorful sides that complement the rich, crispy chicken.
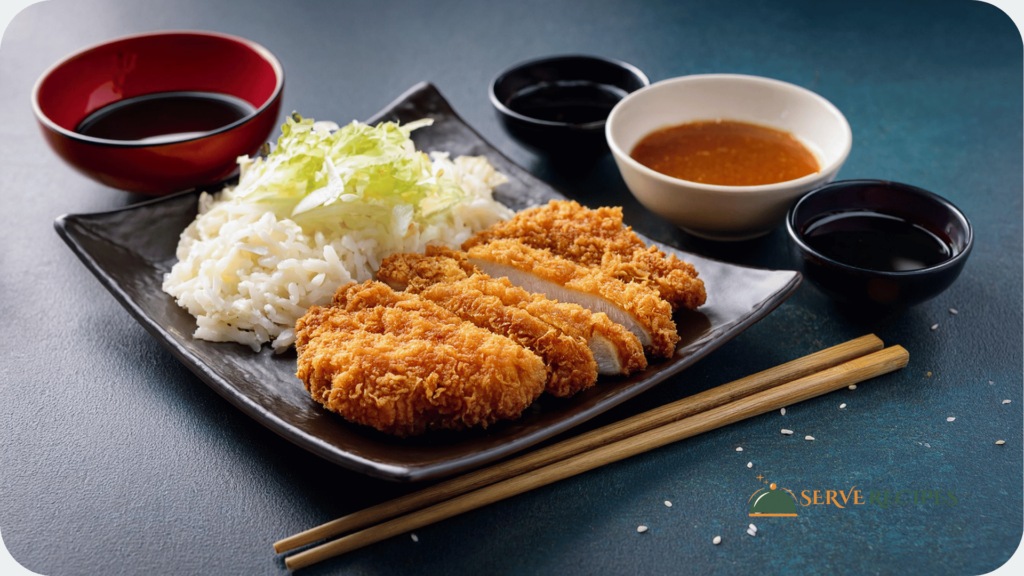
How Chicken Katsu is Typically Served in Japan:
- Shredded Cabbage: A mound of finely shredded cabbage is a traditional side, providing a refreshing contrast to the fried chicken. It’s often served with a drizzle of tonkatsu sauce or a squeeze of lemon.
- Steamed Rice: Plain white rice is the perfect side for chicken katsu, soaking up any extra sauce and providing a neutral base to balance the flavors.
- Miso Soup: A bowl of miso soup is often served alongside chicken katsu, adding warmth and umami to the meal.
Chicken Katsu in Bento Boxes
Chicken katsu is a popular choice for bento boxes, making it a great option for lunch or a portable meal.
How to Pack Chicken Katsu for a Bento Lunch:
- Cut into Slices: After frying, slice the chicken katsu into strips for easy eating.
- Include Rice and Veggies: Pack the sliced katsu with a portion of rice and a variety of vegetables, such as steamed broccoli, cherry tomatoes, and pickled radish.
- Add a Small Sauce Container: Include a small container of tonkatsu sauce for dipping, and garnish with sesame seeds or a slice of lemon.
Modern Twists on Serving Chicken Katsu
While traditional serving methods are always a hit, you can also get creative with how you enjoy chicken katsu.
Chicken Katsu Sandwich (Katsu Sando)
One of the most popular modern twists is the katsu sando—a chicken katsu sandwich.
- Bread: Use thick slices of white bread or a soft bun.
- Condiments: Spread a layer of tonkatsu sauce or spicy mayo on the bread.
- Toppings: Add shredded cabbage, pickles, or even a fried egg for extra richness.
Chicken Katsu Over Curry Rice (Katsu Curry)
Another favorite is katsu curry, where chicken katsu is served over rice and smothered in a rich Japanese curry sauce. This dish is hearty and comforting, perfect for a satisfying dinner.
Katsu Tacos and Fusion Dishes
For a fun fusion dish, try serving chicken katsu in tacos. Use small tortillas and top the katsu with slaw, avocado, and a drizzle of spicy mayo for a delicious twist on both Japanese and Mexican cuisine.
Tips for Perfecting Your Chicken Katsu
Common Mistakes and How to Avoid Them
Even with a straightforward recipe, things can go wrong. Here’s how to troubleshoot common chicken katsu issues:
What to Do If:
- Your Chicken Katsu is Too Dry: If your chicken turns out dry, it may be overcooked. Next time, monitor the cooking time more closely or use a meat thermometer to ensure you don’t overcook the chicken.
- Your Chicken Katsu is soggy. Soggy katsu is often the result of oil that isn’t hot enough. Make sure the oil.